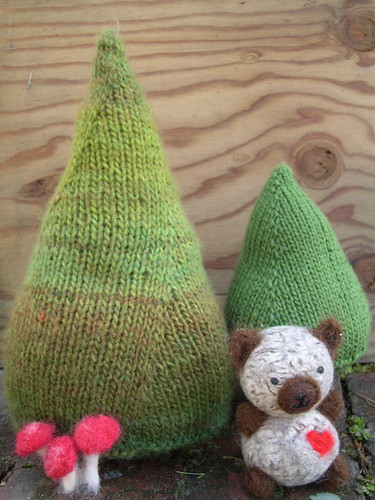
To make a tree you will require:
Any weight of yarn
A corresponding set of four double point needles - choose a size that will make a nice snug fabric, as you want the stuffing to stay inside the tree.
Note on Increasing: where you increase in the rounds will affect the look of the tree. With the large tree, I increased at the beginning of each needle so the increases would spiral around the tree. With the smaller tree, I increased in the middle of each needle, so the tree is a pyramid. If you don't like seeing lines of increases, you can stagger where you increase each time, and they will be less noticeable.
Cast on six stitches and divide evenly among three needles, being careful not to twist. Knit in pattern as follows:
Round 1 Knit all stitches.
Round 2 Increase three stitches evenly.
Repeat these two rounds until the tree is as tall as you’d like.
Round 3 Purl all stitches.
Round 4 Decrease 4 stitches evenly.
Repeat round 4 until there are the right amount of stitches to make a trunk the diameter you like.
Stuff the main body of the tree.
Knit every round until the trunk is as long as you’d like.
Stuff the trunk. Put a weight (such as a stone) in the trunk and a bottle cap or flat object the diameter of the trunk to make a stable surface for the tree to stand with. I used a spool for the trunk of the smaller tree, and left the trunk off altogether for the large tree.
Repeat round 4 until there are 8 or fewer stitches. Cut the yarn, leaving a tail long enough to thread through and gather the remaining stitches tightly. Weave in ends.
Have fun experimenting with yarns and making a whole stand of trees of varying sizes. If you want a skinnier tree, knit two rounds between every increase round. If you’d prefer a stouter tree, skip the plain knit rounds between the increases.


Knitted Conifer Tutorial by Anike Maj is licensed under a Creative Commons Attribution-NonCommercial-ShareAlike 3.0 Unported License.
No comments:
Post a Comment